
Configure your FileZilla desktop client securely to manage, upload, and organise website assets directly from your computer.
This guide will help you configure FileZilla so you can securely connect your computer to your 1-grid hosting account using FTP (File Transfer Protocol). Once configured, you’ll be able to upload, download, edit, and organise your website files directly from your computer. Whether you’re publishing a new website, updating existing files, or creating backups, FileZilla provides a reliable way to manage your hosting account on your 1-grid Customer Zone.
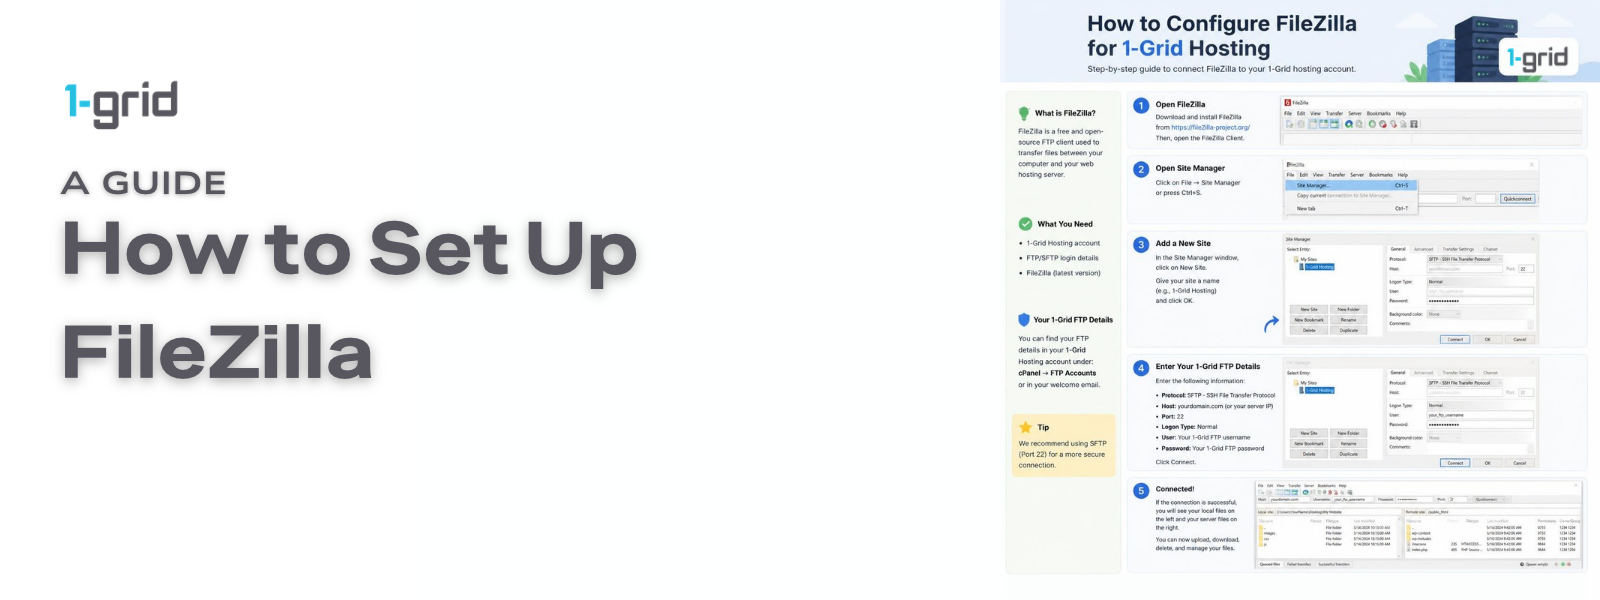
Before You Begin
Before linking your local terminal configuration environment to your remote directory space, make sure you have:
- An active 1-grid web hosting account
- The FileZilla Client software application downloaded and installed on your desktop
- Your verified transfer details ready (FTP Hostname, FTP Username, and FTP Password)
💡 Tip: If you are missing these transfer credentials, retrieve them from your How to Find Your FTP Login Details guide within your central cPanel or control panel interface before moving forward.
Follow These Steps
1. Open FileZilla
Launch the FileZilla desktop program on your computer.
2. Open Site Manager
Move your cursor to the top main app toolbar and navigate to: File → Site Manager. The Site Manager module is where the client securely caches your persistent configuration profiles.
3. Create a Folder (Optional)
If your hosting profile handles multiple domain spaces or staging environments:
- Click New Folder inside the profile management screen area.
- Supply an organisational name to cleanly cluster your distinct workspace files.
4. Create a New Site
Highlight your folder, select the New Site button, and assign it an identification label (e.g., My Business Website).
5. Enter Your Hosting Details
Complete the central configuration properties sheet layout by inputting your explicit hosting parameters:
- Host: Your specific server IP string or target hostname (e.g.,
ftp.yourdomain.co.za). - Port: Leave blank by default unless your specific account package instructions specify a custom port number rule.
- Protocol: Select FTP (or choose SFTP / FTPS if your system tier supports encrypted transmissions).
- Encryption: Select the recommended encryption method layout matched to your hosting tier profile.
- User: Type your full FTP account username string.
- Password: Input your explicit FTP account password string.
6. Configure Default Directories (Optional)
Click over to the Advanced tab layout menu. If you constantly pull or push assets to the same folder tree arrays, define your Default Local Directory (your computer folder location) and Default Remote Directory (typically your server public_html root path).
7. Review Transfer Settings
Open the Transfer Settings tab block. Keep the parameters marked at their systemic factory default values unless our engineering agents have instructed a manual adjustment to troubleshoot network constraints.
8. Save Your Site
Click OK at the bottom of the tool frame window to save your connection profile map. Your credential parameters are now saved.
9. Connect to Your Website
Click the small dropdown key next to the Site Manager toolbar shortcut icon, pick your saved site card, and click Connect. Once authorisation handshakes pass, your screen layout will display:
- Left Panels: Your local computer directory folder maps and file systems.
- Right Panels: Your live remote website hosting files and server root folders.
- Action: Drag and drop items smoothly across the splits to execute instant transfers.
10. Disconnect When Finished
Once file transmissions show complete, click Server → Disconnect, or select the Disconnect socket icon button on the top menu strip to terminate the live session loop cleanly.
What Happens Next?
Once connected and saved, the profile establishes an authorised gateway tunnel.
- Instant Overwrites: Moving altered content layouts into your remote explorer row updates your live customer experience on the spot.
- Transfer Queue Tracking: The bottom tracking desk interface displays successful file streams or flags dropped packets for manual re-queuing.
Important Things to Know
- Direct Desktop Sync: Unlike browser apps, FileZilla maps transfers natively from desktop storage layers, making it highly effective for batch uploading massive graphic loops or full directory trees.
- Independent Authentication Layer: Your unique transmission passwords are separate from your content management system dashboards (like the WordPress login wall).
- Network Speed Volatility: Pushing large data blocks or complex scripts can take a few minutes depending on your ISP network pipeline. Ensure queues read entirely clear before quitting.
Common Mistakes to Avoid
- Typing your structural main administrative portal credentials inside the transfer user blocks instead of your explicit FTP details.
- Uploading web directories or static index assets outside of the required public server directory (typically
public_html). - Moving items across split windows too quickly and accidentally dropping code folders into random sub-folders.
- Closing out or shutting down your desktop computer terminal before the queue indicator finishes processing background streams.
If This Didn’t Work
If connection handshakes crash with a time-out log warning message or authentication rejection error line, confirm that your localised computer firewall or antivirus suites aren’t actively blocking network port requests on port 21 or 22. Ensure your active hosting subscription reads active within your Customer Zone dashboard.
You’re Ready!
Your desktop FileZilla client environment is completely configured to communicate with your remote storage. Managing, auditing, and backing up your technical website directories can now process smoothly directly from your desktop workspace.
Related Articles
- How to Find Your FTP Login Details
- Upload Files Using cPanel File Manager
- Understanding FTP, FTPS and SFTP
Need Help?
If FileZilla reports connection drops, authentication failures, or loop errors that block your site deployments, contact us. Our Support Team is ready to provide guidance and support.
To ensure our engineering teams can inspect your transfer line quickly, please provide:
- Your primary domain name and active web hosting account selection
- The complete log text strings outputting inside the top FileZilla status console area
- A screenshot of the error notice window view showing the failure
- Confirmation of your chosen transfer protocol layout selection (FTP, FTPS, or SFTP)